Hello! Emma from Edge and Virtue is here and I’m back again with my second short tutorial of invitations that I made using The Whimsical Friends Bundle.
This set of invitations was put together using “BeFunky” which is an online image editor, it’s easy to use and you can have your invitations made, saved and ready to print within minutes! “BeFunky” is a brilliant online alternative to Photoshop for simple projects like this. TheHungryJPEG gives you all the elements you need in a readable format so that images can literally be dragged and dropped onto a blank canvas for your project.
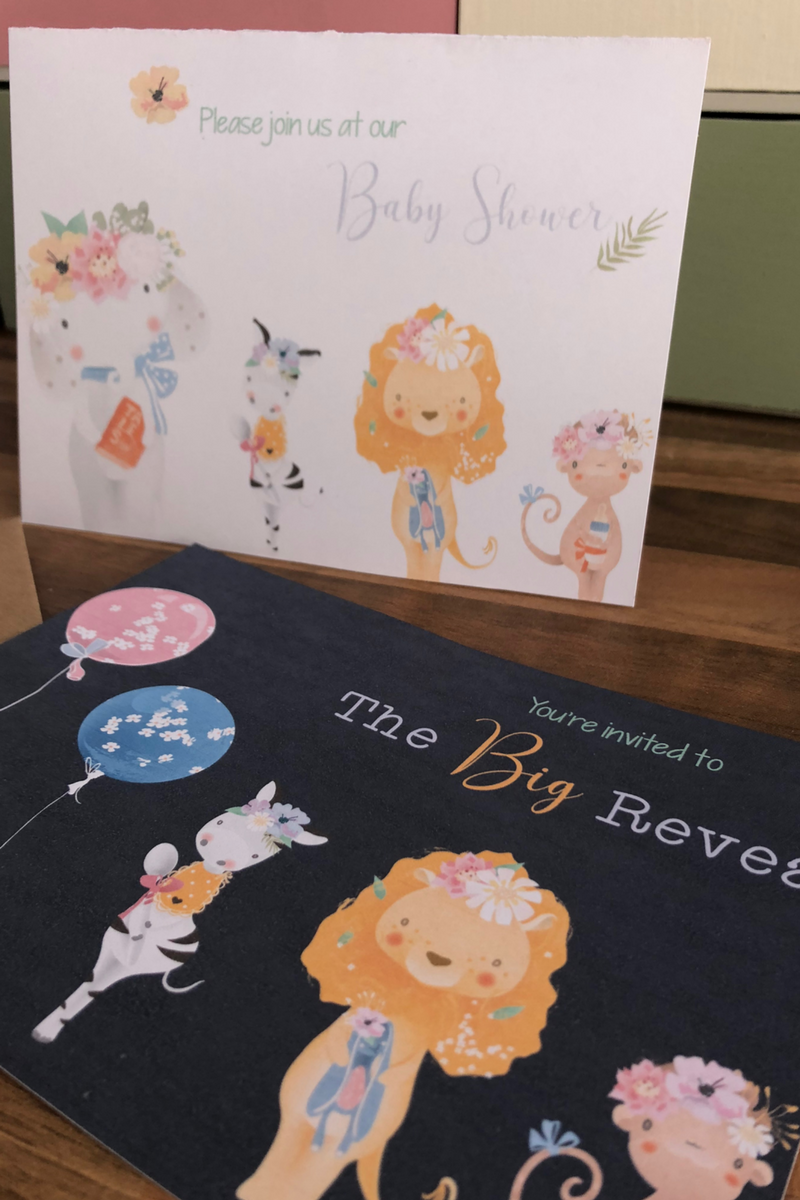 This set of invitations has been created just using the online tool and the elements found in the Baby Safari Collection.
1. Open www.befunky.com, and click on “Designer” at the top.
2. There are various free templates you can use for your projects, but for blank design for cards and invitations like these scroll down to “Blank Templates” and select “Event Graphics”. You can then choose a size to suit your design or to match envelopes if you already have them.
Tip: We used 7” x 5” as you can comfortably fit this onto an A4 page with room to fold into a card invitation.
3. Once you have selected your size you can start designing!
4. There are six icons down the left-hand side worth familiarising yourself with;
Image Manager, Project Manager, Templates, Background, Design Elements, and Text.
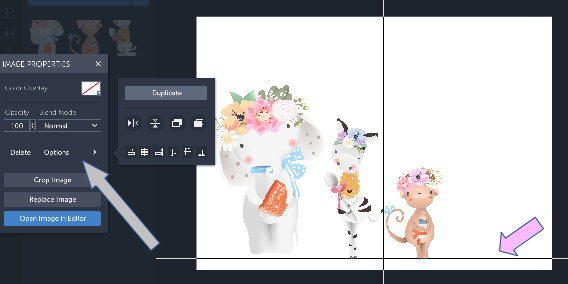
5. Using the top icon – Image Manager – locate on your computer the first image you would like to use for your design. We have used the elephant in this example.
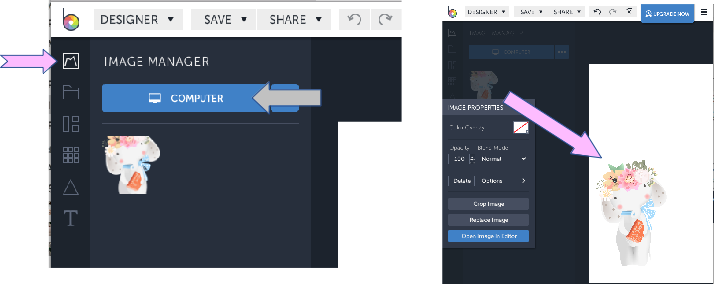
6. Once your image shows up in the window, you can drag and drop it onto your blank design.
You can edit each image using the image properties box, where you can crop it, fade it into the background, use the color overlay tool to change the tone of the picture.
Tip: When placing your pictures, look for the black line as this tells you if they’re aligned correctly. You can also use the icons in the options pane to place them in various sections of the canvas, i.e. centered or bottom left.
7. When you have placed all your images you can put in some text. Use the T icon at the bottom of the list on the left-hand side. You’ll then need to double click on the text to edit it.
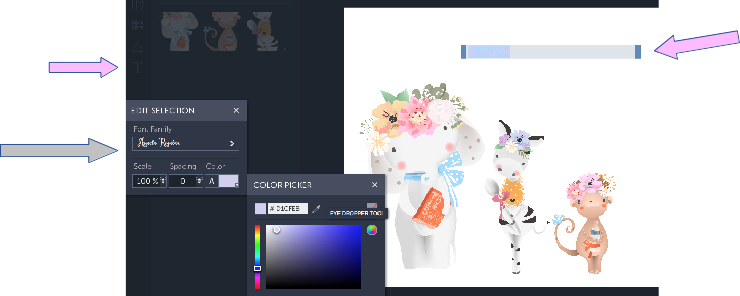
8. Type your desired text into the text box. You can then edit the text using the Text Properties box. Here you can use the fonts they have provided for you, or your own fonts, such as the ones downloadable from Hungry Jpeg, I have used Asyiela Regular. The text size and colour can be changed from this box, including the adding and removing of a text shadow, which is done using the second and third colour blocks. If you’d like to match the text colour to the images, click the small arrow in the bottom right corner, and then select the little pipette, we used the colour from the Zebra’s flower for the ‘Baby Shower’ and from the Elephant’s leaves for the top line of text.
Tip: Text can be dragged and moved just the same as images can, they can also be made bigger and smaller using the blue circles, and rotated when you see the connected black arrows.

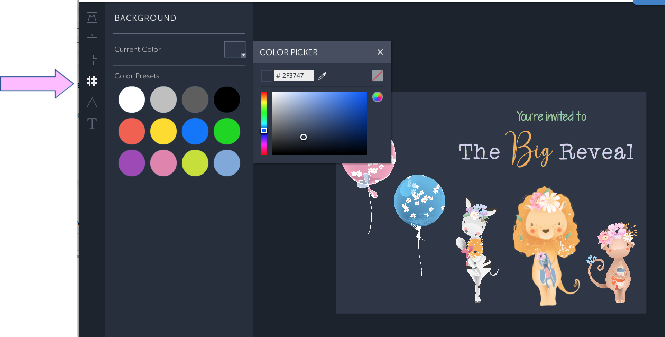
9. On our “Big Reveal” Invitation, we noticed the strings on the balloons in the Accessories bundle were white so weren’t showing up, by changing the background colour we were able to fix this quite easily. You can do this using the icon on the left-hand side with the 9 small squares.
10. Once you’re happy with your design, use the SAVE button at the top of the page. Select computer and you will be able to rename your document and choose a format to save it in. JPEG images can be opened with most programs so we would advise this format.
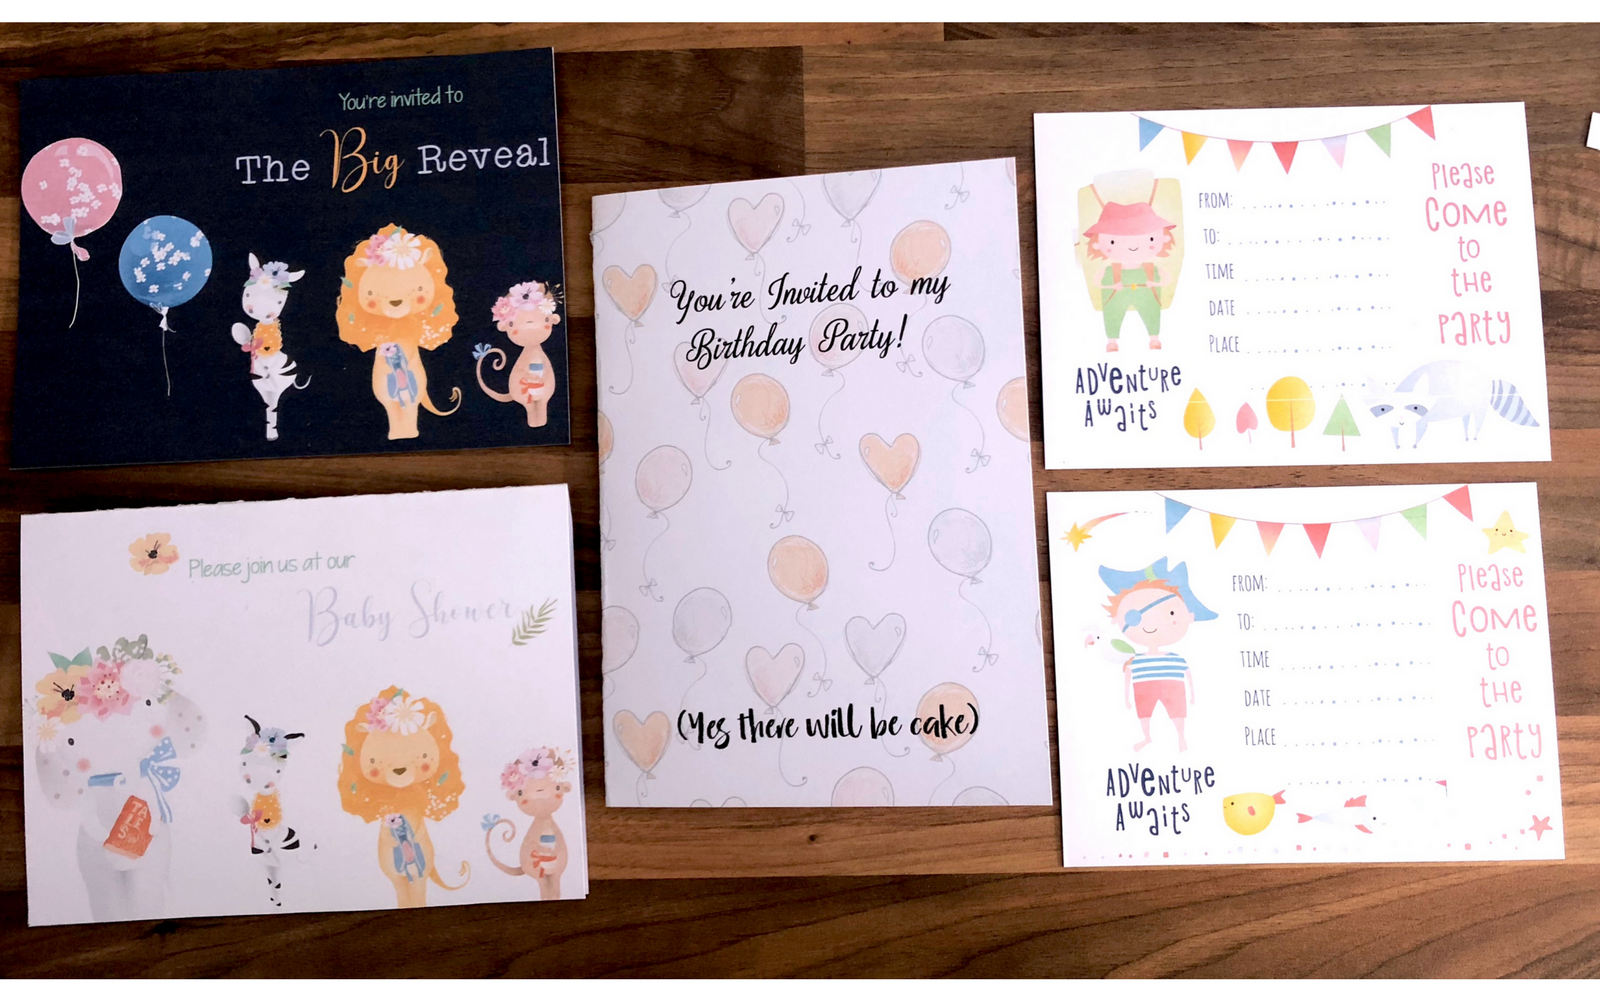 With 21 design themes to choose from you’ll be spoilt for choice with this bundle. Whether you want to create invitations, greetings cards, menus or social media graphics, using The Whimsical Friends Bundle with an online editing tool like BeFunky gives you endless possibilities!
Hope you like it! ♥