Calligraphy isn’t merely an art; it’s also an expression for a kaleidoscope of thoughts, emotions, and feelings. Even if you get a chance to lay your hands on every calligraphy book in the world, you’ll never be able to figure out the practices unless you try them yourself. We make mistakes and we learn from them and this is how we proceed to master the art of calligraphy.

Source: Behance@black3angle
But let’s just forget all the hassle and get down to take our cue from the lessons already catered to us by the masters. Why bother reinventing the wheel when you have an advanced one in front of you? No, I’m not talking about the evolution of tire from the wheel; I’m talking about the journey of calligraphy from paper to the graphics tablet.
Digital calligraphy is becoming the future thing now and every designer is down for it. But you must ask, why just calligraphy? Well, it saves you time and comes with an Illustrator ‘Ctrl + Z’ option (Lucky us!) as compared to the paper counterpart. But that’s a little too much to digest for a newbie, don’t you think?
Even when you’re hopping from paper to a digital artboard, it’s important to not throw some basic facts under the bus and go smoothly with the flow. As per the Buddha of digital calligraphy (Yep, made that one up!), you must start with the basics and take your chance with the dos and don’ts of calligraphy – from the tip of the brush to having your calligraphic design printed.
Grab your gadget and get cozy because we’re ready for the takeoff in 3… 2… 1…
The Dos Of Digital Calligraphy
- Research For Tools and Materials
As a beginner, it’s always a good idea to start by researching tools and techniques. You can’t possibly think of starting without proper tools for calligraphy. Google for the ‘calligraphy supplies for beginners’ and you’ll see a list of numerous pens, brushes, and other tools. But take it from us: For your initial calligraphy, start off by using pencils and Crayola markers or Sharpies. These are the classic tools that offer you the flexibility to discover how well you can write.
Once you establish your pace, you’re ready to advance towards the next levels of brush calligraphy, such as Tombow dual brush pen, the watercolor brush pen (comes in 3 different sizes), and the illustration pen. Make sure you also see what specific function each tool performs and use that accordingly. If you’re having troubles, you may head to Google again and print some calligraphy worksheets for practice.
You can later move on to using the pen and brush tools in the drawing software in the future. Just wait for it!
- Practice On Paper
Paper is your best friend. Nothing speaks the language of calligraphy than paper. But calligraphy demands a smooth flow of your liquid medium – whether be it ink or watercolors – and affects the quality of the paper.
If you’re using pencils and ink-based markers, a usual thin paper may work just fine, but if you’re using heavy liquids, you must use a hard-paper based notepad, which doesn’t let the ink run or doesn’t get soggy.
Here’s A Tip: Use the Rhodia DotPad or the likes for practicing. It’s an acid-free dot grid paper notepad used exclusively for drawings and sketching. It should come in handy when you’re using it to trace on the graphics tablet.
- When Done With One, Try Using Different Fonts
When you’re practicing calligraphy, it’s always recommended to stick to one font or type. Let yourself be free of all the tangles and curve hassles of the font you’re practicing. Most beginners go for cursive fonts as they are equally easy and challenging.

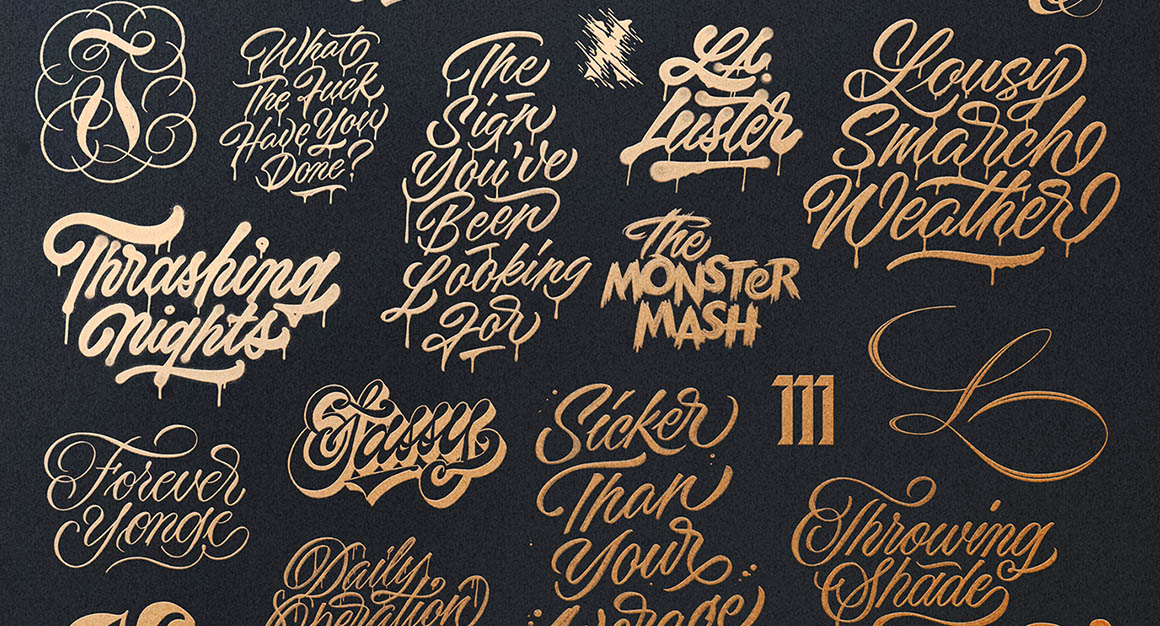
Source: Behance@MichaelMoodie
To improve your penmanship, it’s recommended that you keep your wrist fixed on a uniform surface and hold the pen correctly. If you learn how to improve your curve, you’ll be able to write in a variety of ways. There are many other fonts and types you can practice. Go ahead and try to create an Arabic calligraphy logo design if you’re up for the challenge!

If you need inspiration and ideas for fonts, check out HungryJPEG’s exclusive bundles with great values!
- Shift The Exercise To Digital Platform
When it’s all said and done (on paper, of course!), it’s time you take a deep breath and add that graphics tablet to your Amazon cart (in case you haven’t purchased one). But first, research about the graphics tablet that is beginner-friendly and comes within the premises of your budget. Shifting your practice to the digital platform will help you make curves smoothly and regulate your flow – much easier than the mouse!
According to Just Creative, you must consider the main factors of the tablet, such as the active area, features, stylus, model type, pressure sensitivity, resolution, and so on. The best one on the list is, however, Wacom Intuos Pro Digital Graphic Drawing Tablet, which is the preferred choice among novices and professionals alike. It could be a bit costly, but definitely the best bargain you’ll make!
- Watch Tutorials And The Experts
Tutorials can help make you a master of whatever you want to learn. All you have to do is just type in your search on YouTube and choose from the list of calligraphy tutorials for beginners. For a better practice session, slow down the video to half of the normal speed and repeat the steps as you go.
Notice what products the experts recommend for calligraphy newbies. Also, don’t forget to notice how they’re using their hands to use the stylus and how they’re using Illustrator or Photoshop for this tutorial. Watch for the techniques and tips they deliver. Once you’ve jotted down a mental note of all the important points, you can become a pro in no time.
- Be Patient And Attentive To Details
Practice and patience make a man perfect, especially when you’re attentive to details. In the above-mentioned point, noticing all the verbal as well as behavioral cues improves your practice to a great extent. For instance, if a calligraphy pro is writing a word, say ‘minimum’, watch how much pressure they’re applying, see at what angle are they holding the pen, or pay attention to the thickness and thinness of the strokes.
Small details like these might not be evident at the start, but it’s like a skill that needs time to hone. All you have to do is just be patient and willing to learn!
- Undo, Then Redo
It’s OK to make mistakes, even in calligraphy too. If you’re practicing on paper, just consider the mistakes a part of the learning process. It’s how you’ll learn; for example, you’ll learn about the type of paper and pen to use.
As for a digital platform, it’s quite easy to just go back over a mistake by pressing the undo option (Ctrl + Z for the shortcut) in the Illustrator or the Photoshop. But if you’re repeating the same mistake like holding the stylus at a wrong angle or applying too much pressure, watch out for issues like these and redo your steps in the correct way.
Don’ts Of Digital Calligraphy
- Being Impatient
Scurrying up this delicate art is like messing up the ingredients of a delightful dish. Most of the tutorials you watch are actually speed art, which cut the entire duration by squeezing the whole process into a matter of minutes to save time.
At this point, you must understand that it’s the consistency that you need. And to develop a steady pace, you can just go by practicing a certain stroke, spacing, and angles.
Sometimes, you might want to give up, but it’s OK. Just calm down and practice one step at a time until you master the skill.
- Not Researching Enough
Without proper knowledge and research, you can’t possibly find inspiration for the best practices. Even if you start on your own, how do you suppose to come across all the tools and techniques which are going to ease the learning process for you?
It might get complicated when you don’t have a single idea about which brush to use and what type of stroke goes where. Research, my friend, is the key to penetrate the field.
- Ditching The Basics
It’s obvious. Leaving out the basics becomes lethal for your calligraphy practice. It’s like expecting the Empire State Building to stand its ground without a solid foundation!
Following the fundamentals is highly recommended because if you do not follow them, you’ll get used to a wrong practice, which will leave your calligraphy flawed. On a digital front, using professional design software like Adobe Illustrator or Photoshop can be a bit overwhelming for many beginners.
Don’t just jump into the speed art professional calligraphy without discovering what each tool is used for. Remember the small basics like your posture, the placement of your tablet, your holding angle of the stylus and so on.
- Expecting To Master The Art At First Attempt
Thinking that you can master the art in just one go can do nothing else except disappoint you. There isn’t a single person on earth who became a pro without having dealt with the hassles first.
When you’re expecting too much, these hopes keep you away from your goal. Better leave them behind and take a fresh start every time. Be curious about what you’re going to learn next and stick to it.
- Using Professional Tools First
Delving into professional tools and techniques will prove aimless for you. Why? Because without knowing the specifications of a tool, you possibly can’t use it the way it’s meant to be used.
Consider a scenario here: You watch a tutorial where the calligrapher uses a professional tablet and expensive software. The calligraphy session is so interesting that you’re already drooling over these gadgets and software and want to use these to achieve the same results.
Now that you’ve purchased the exact items, what else are you supposed to do with them? If you’re a newbie and the products you purchased aren’t beginner-friendly, you’re going to end up with a poor investment.
Just stick to the products recommended for novices and search for the reviews of how the X product has helped beginners achieve their calligraphy goal.
- Weighing Down The Art
Calligraphy is a neat art that loses its value when laden with redundant design elements. As much elegance it needs, you need not to introduce design elements or additional strokes to add your own idea of aesthetics.
Sure, you can come up with a custom font when you’ve mastered one. The main thing is to not exaggerate any aspect of calligraphy beyond the point of balance. If it loses balance, it will lose its overall beauty due to one overdone serif or the hyperbolized type shoulder.
It’s better if you go through a quick guide on type anatomy to understand how different types can be worked with.
- Not Minding The Font Size
Size of the font and the strokes matter in calligraphy. This art demands perfect balance, which is necessary for maintaining the aesthetics.
Beginners usually don’t realize the difference when it comes to working with different font sizes, which could lead them affixed to one font size without having the flexibility to adapt to another. Big or small, pay attention to the defining factors of each font.
- Not Sticking To The Guidelines
Guidelines are made for a reason. Not following them will leave you with an asymmetrical and disproportional word art.
Whether you’re using paper or computer, you’re a beginner who needs reference lines to keep each calligraphy element the same size, angle, and height. Even professionals use these guidelines to keep their writing in one line!
It just takes a few seconds to draw a guideline or enable the grid on your digital artboard. And it’s going to help you A LOT! You can also make a freehand guideline, making sure your word art stays in a nice equilibrium.
Summary
So there you have it! We discussed all the main dos and don’ts of paper and digital calligraphy for newbies. The transition from basic to the advance stage takes time, which is why it’s OK to make mistakes at the beginning than at a professional level.
It doesn’t matter how long it takes; if you’re persistent and consistent, there’s no way you’re going to miss out on the most apt techniques and steps to hone your calligraphic skills. Just remember: Slow and steady wins the race. Rushing won’t help anyways!
So, what do you think? Did we forget to mention any important do or don’t of calligraphy? Feel free to remind us!
Jennifer Stone is a devoted graphic designer who has dedicated her time and experience to logo designing. She keeps a birds-eye view of all the trending news on the logo design desk. Her hobbies are intertwined with her profession, which allows her to explore her love and passion for graphic design and that’s why she heads for random design on the internet and comes up with creative and easy-to-follow ways of graphic design creation.